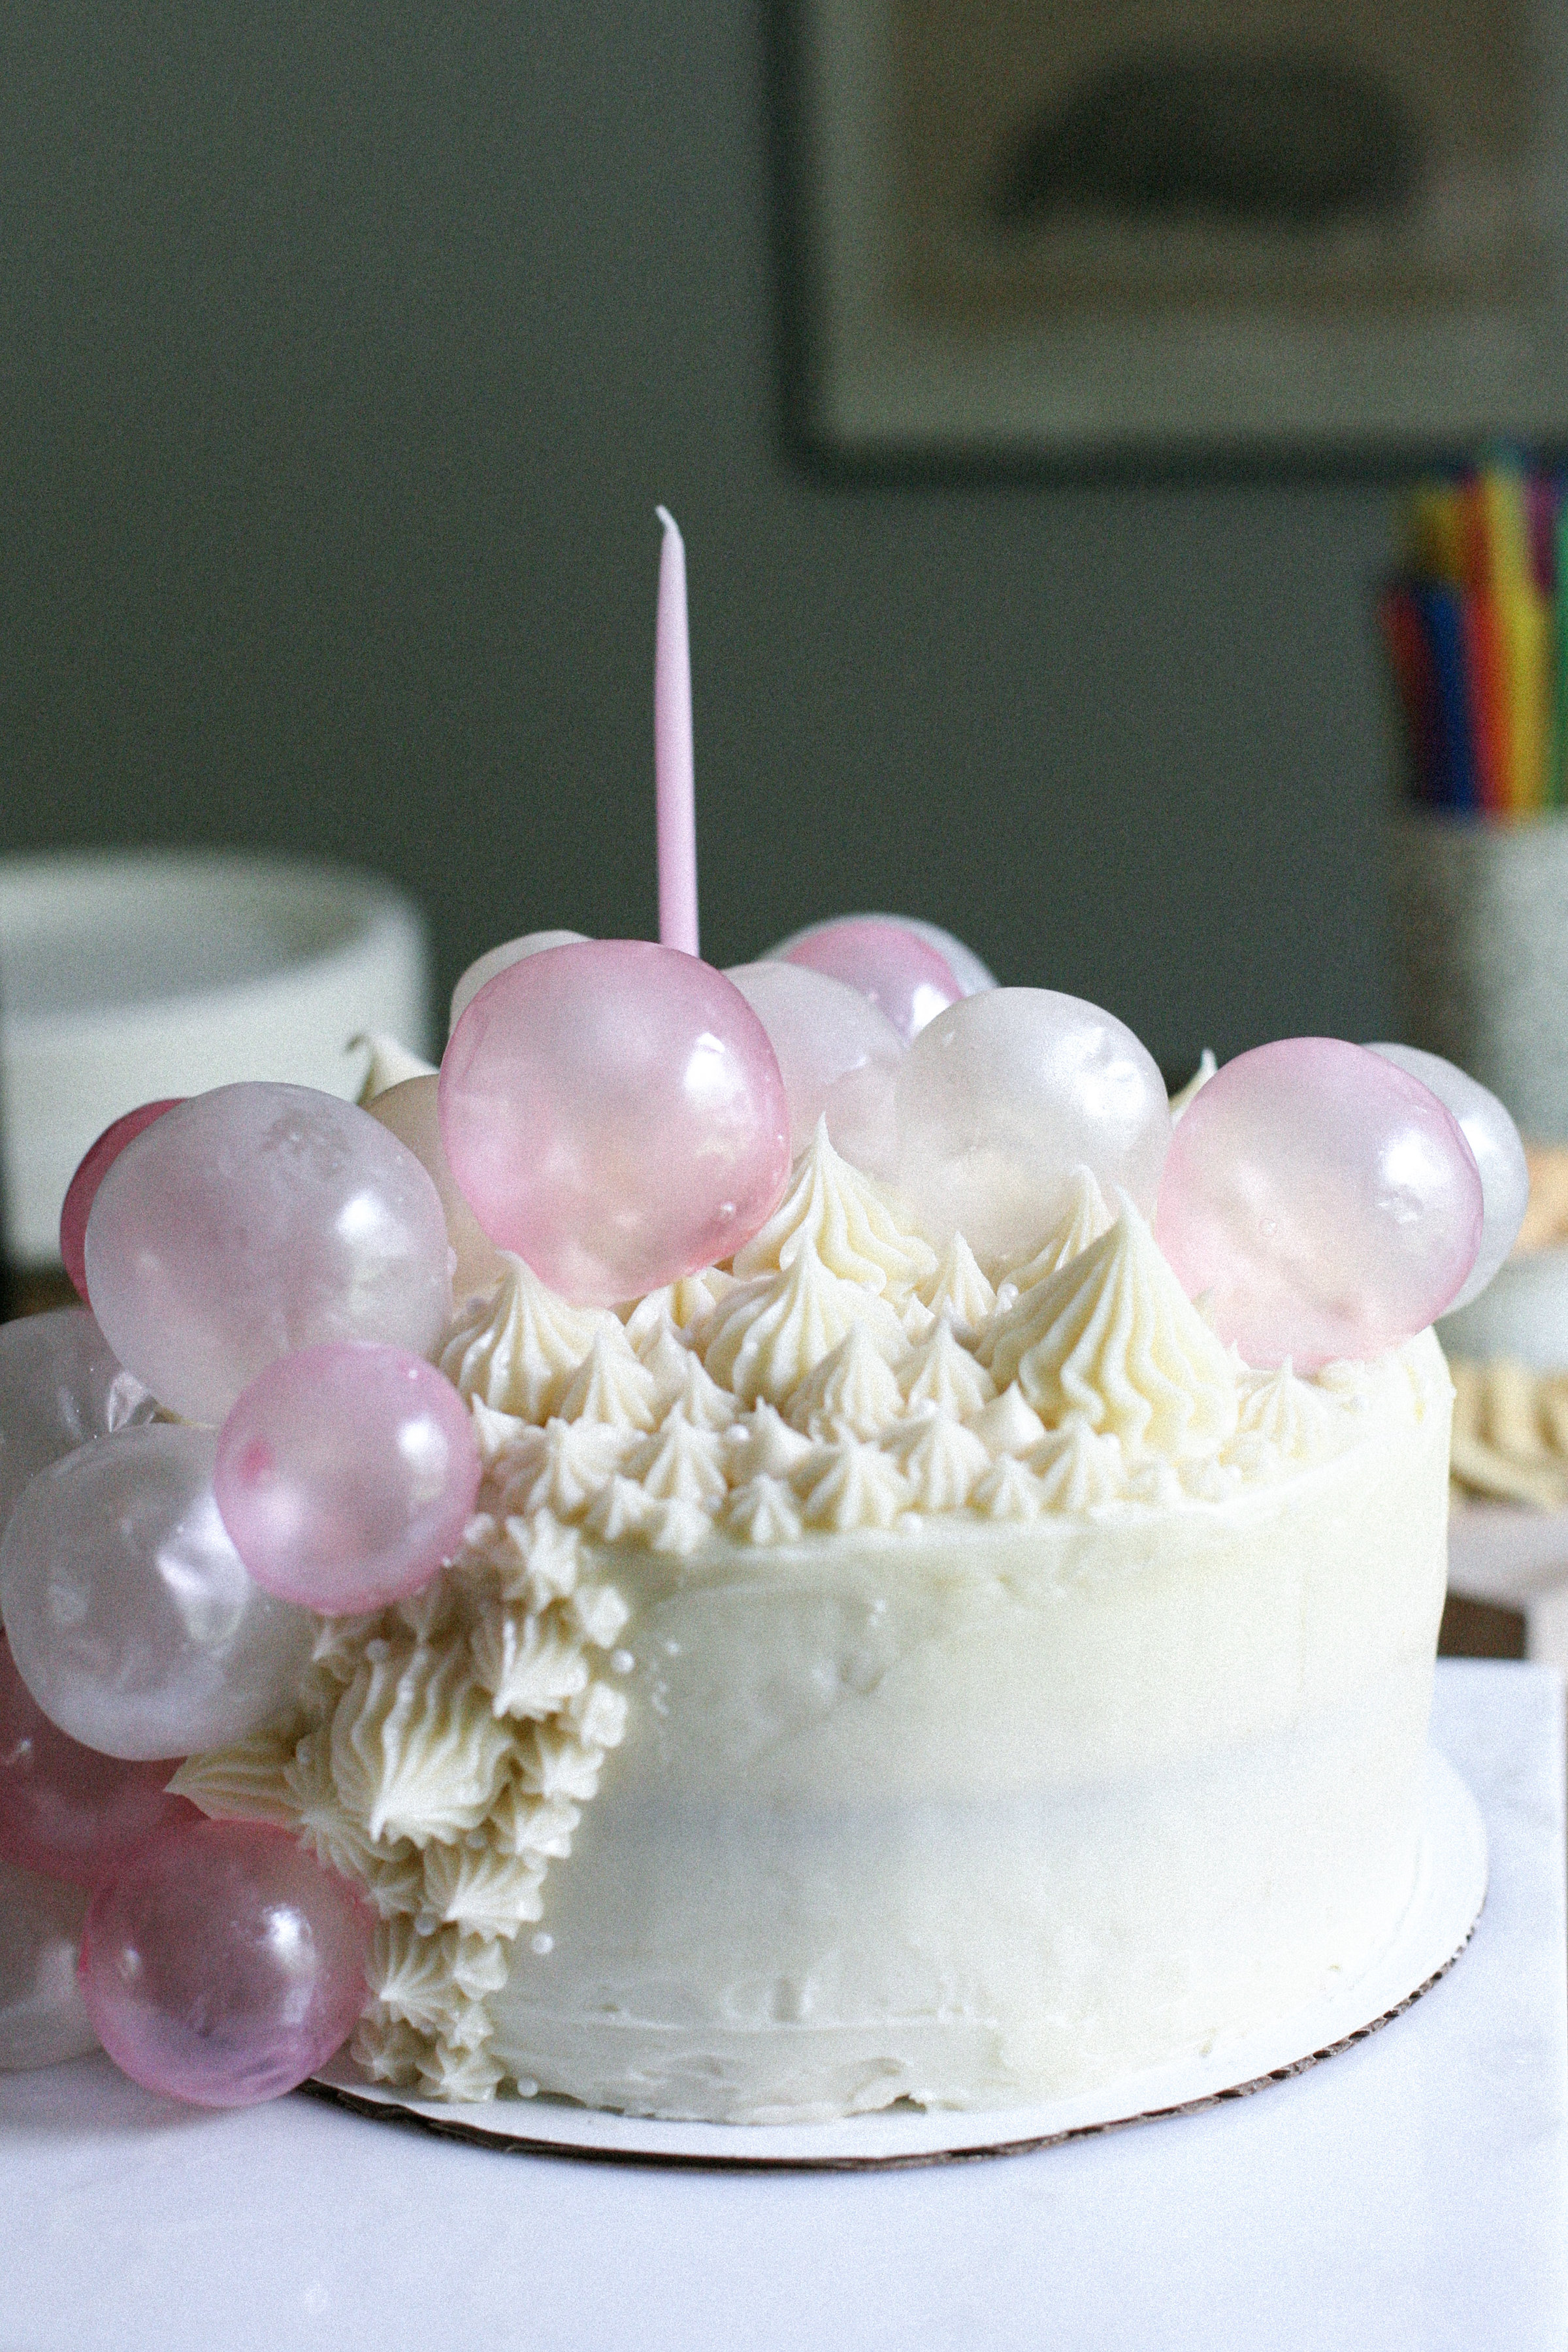
Lavender Bubble Cake
My youngest niece just celebrated her first birthday! Her lovely and talented mother had the brilliant idea to host a bubble themed birthday party to mark the occasion. To avoid cranky littles, the party was set for 3:00pm which conveniently fell after most of the guests' afternoon naps. The party was out of doors and featured wading pools, light snacks and (of course) a bubble machine! The adults were thoughtfully supplied with bubbles of their own in the form of mimosas (classic and peach! #summertimetwist). It was basically the perfect afternoon summer party.
Molly, mother of the little birthday lady, asked me to make a birthday cake for this lovely occasion and I jumped at the chance to use a new decorating technique. Gelatin Bubbles FTW!!!! The lovely photos were taken by Molly Stilley, mother of the little birthday lady. Molly is an incredible blogger/photographer at the irrelephant blog so look her up on the blog here, irrelephant's Instagram here and her photography Instagram here!
The cake in its entirety took some advanced planning and a lot of patience. This cake design is not recommended for the first time baker though the cake itself and the gelatin bubbles are super easy to craft. Let's start with the good stuff... The Cake!!!
Honey Lavender Cake
with Honeyed Cream Cheese Frosting
This recipe makes a rather large three layer 9" round cake plus a 6 inch single layer. You can cut this recipe in half for a smaller cake and into thirds for cupcakes but, having made this cake several times now, you will not have leftovers if you do.
- 5 1/4 cups all purpose flour
- 1 1/2 tbsp. baking powder
- 2 tbsp. dried lavender
- 1 1/2 tsp. salt
- 1 1/2 cups unsalted butter, room temperature
- 3 cups sugar
- 3/4 cup honey
- 3 tsp vanilla
- 6 eggs
- 2 cups of whole milk
- Honeyed Cream Cheese Frosting
Preheat oven to 350 degrees F. Grease and lightly flour three 9" round cake pans (and one 6" cake pan) and set aside. In a medium bowl combine the flour, baking powder, lavender and salt.
Beat the room temperature in a large bowl on medium-high speed until it is fluffy, about 30 seconds. Add the sugar, honey and vanilla and mix until fully incorporated. Add the eggs one at a time, mixing well after each addition.
Add 1/3 of the dry mixture to the butter mixture and beat until just combined. Add half of the milk and beat. Alternate adding the remainder of the dry mix and milk beating after each addition.
Evenly divide the batter between the three pans, filling the pans 3/4 of the way and smooth (use the excess batter for the smash cake). Bake for 30-40 minutes or until the centers are set and an inserted toothpick comes out clean (bake the single layer 20-28 minutes). Cool the cake in the pans until cool to the touch then invert the cakes onto a cooling rack.

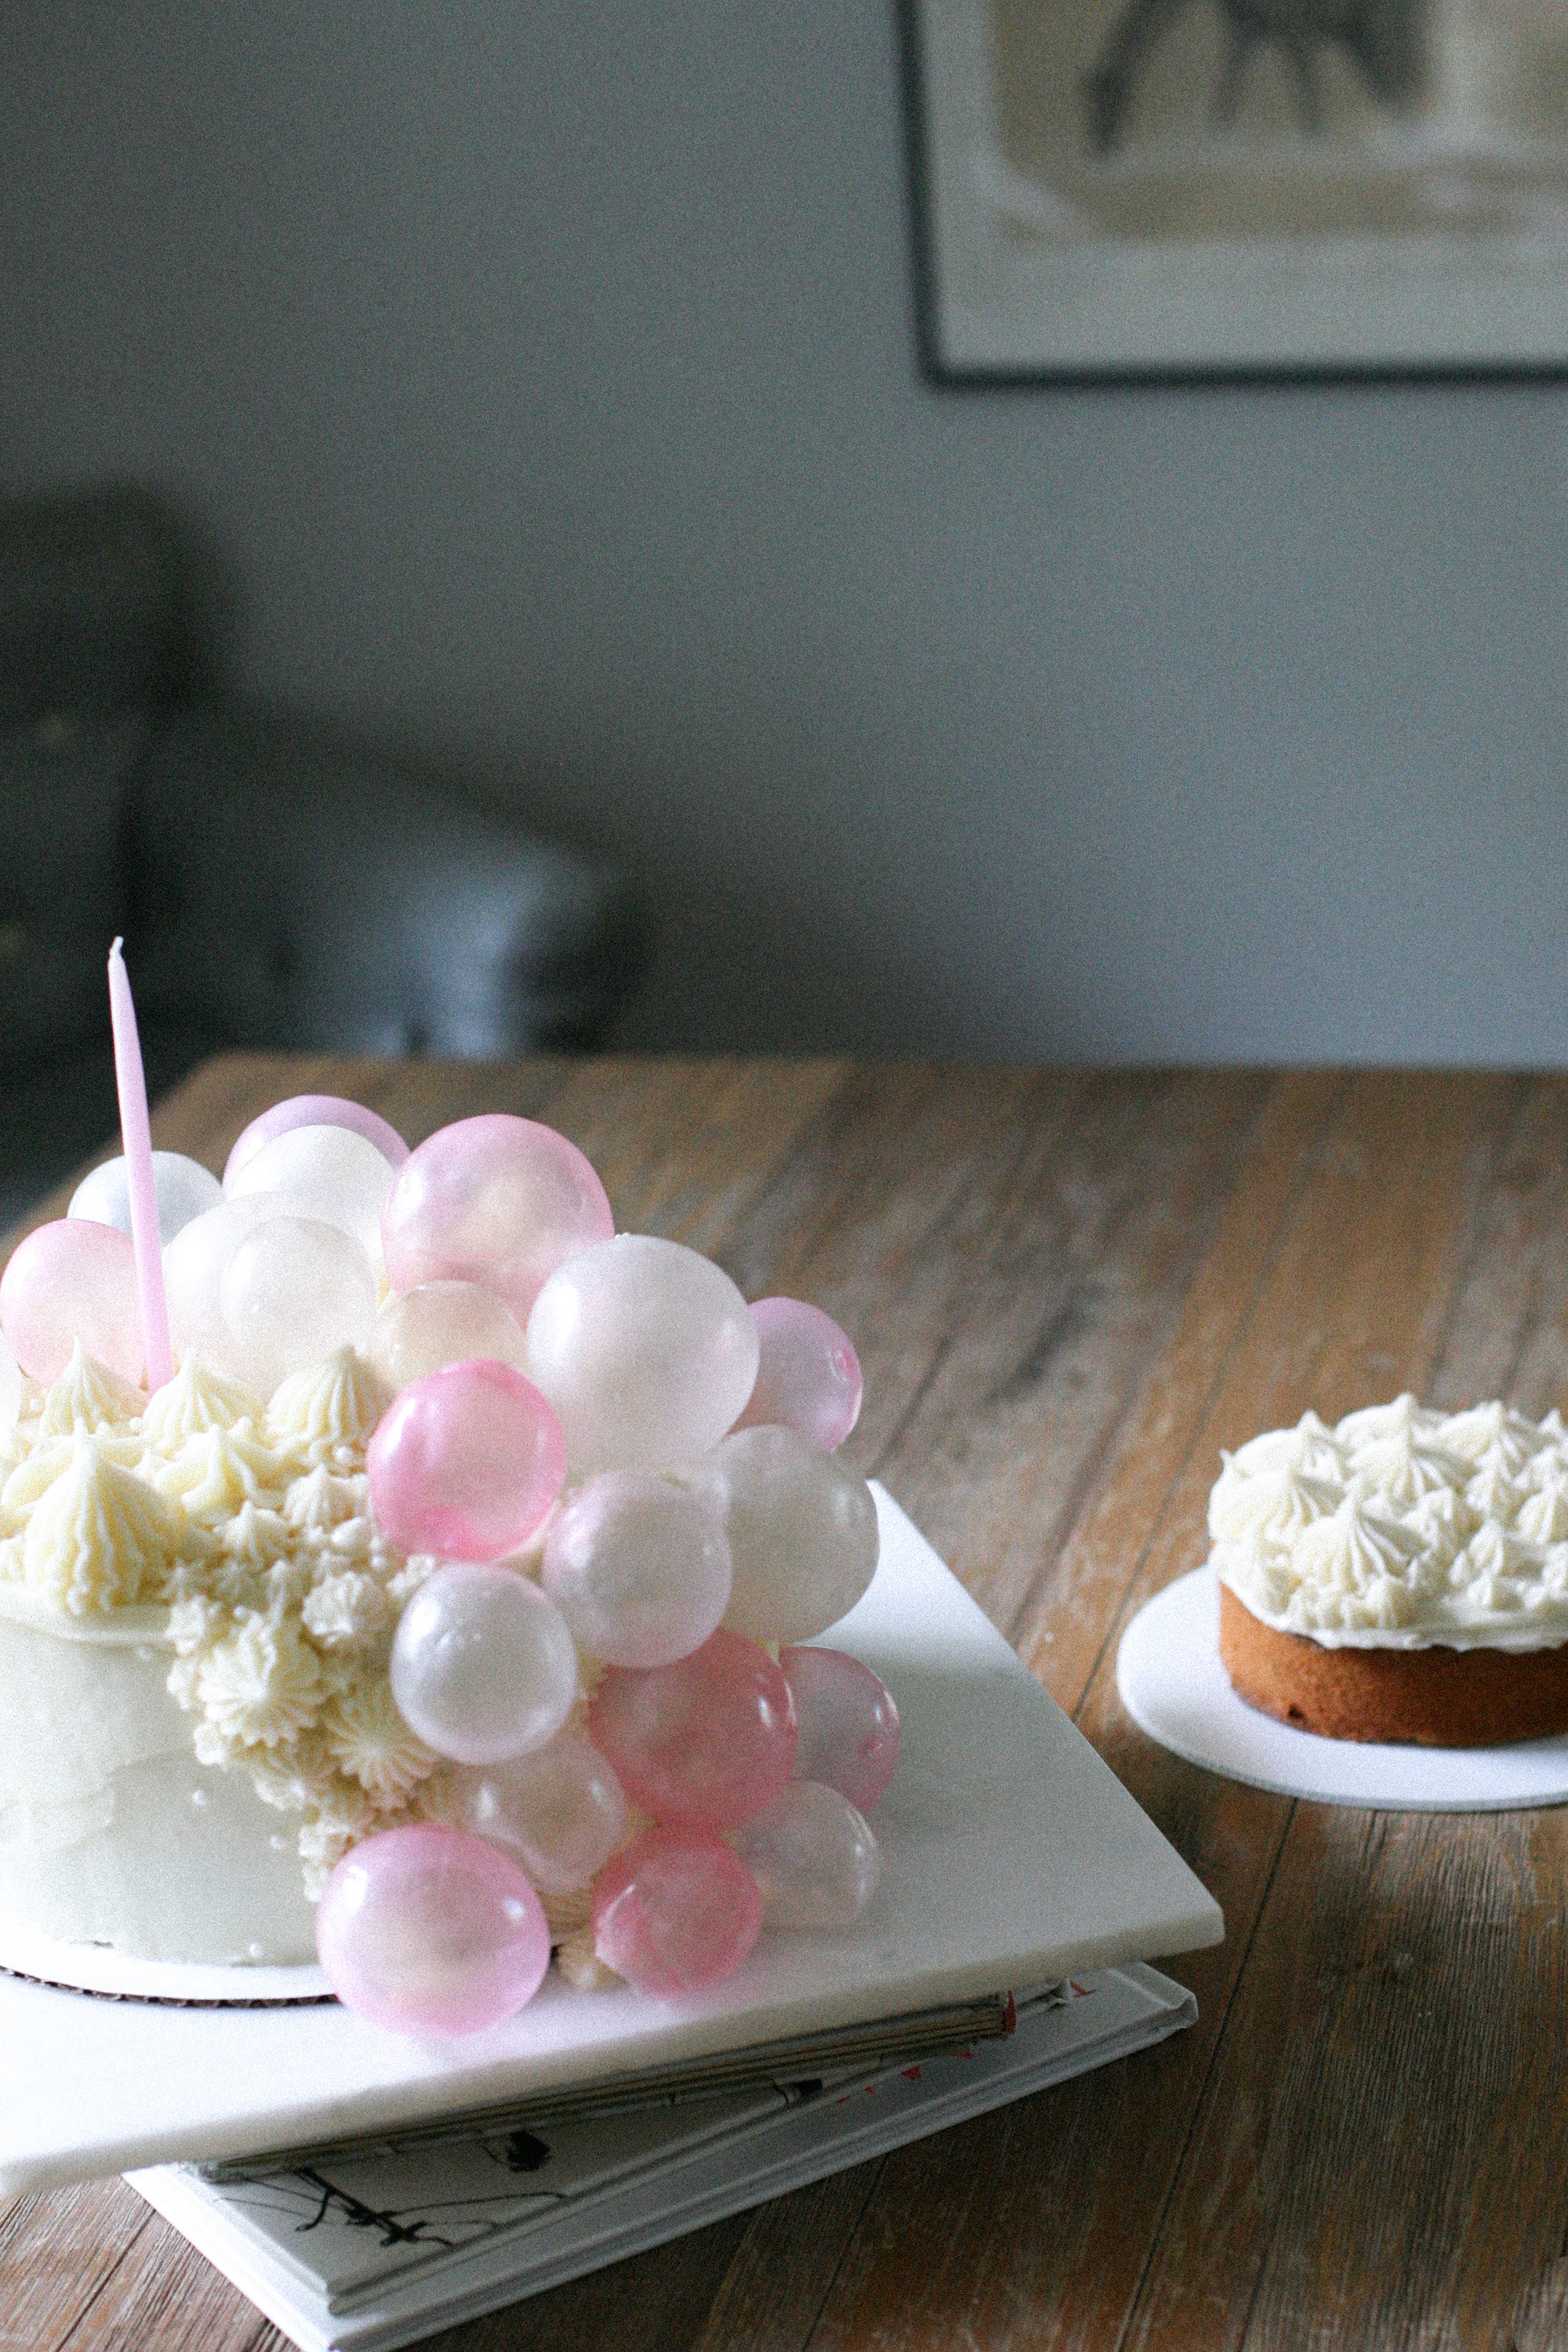
This is the smash cake. For all you single and/or kidless folks out there, all 1st birthday parties are REQUIRED to have a smash cake.
Spread, pipe or spoon your frosting onto your cake and decorate as desired. Keep reading for the Bubble Design tutorial!
Honeyed Cream Cheese Frosting
Again, this makes a crap ton of frosting! This amount of frosting is intended for elaborate decorations so if you want a simple, lightly frosted cake, cut this in half. Same thing goes for cupcakes. If you LOVE frosting, don't change a thing.
- 20 oz. cream cheese, room temperature
- 3/4 cups unsalted butter, room temperature
- 1 cup honey
- 2 tsp. vanilla
- 12-13 cups of powdered sugar
Beat the cream cheese and butter in a large mixing bowl until the mixture is light and fluffy. Fold in the honey and vanilla. Gradually add the powdered sugar to the butter in 1 cup increments until the desired texture has been reached. I tend to err on the side of less sugar UNLESS I am piping intricate designs. For the bubble design, I made this with all 13 cups of sugar.
Gelatin Bubbles

This is the most time consuming part of this configuration. The supplies are really cheap and the results are totally worth it.
- 2 packages of plain powdered gelatin
- 16 tbsp. water
- liquid food coloring, I used rose pink
- white powdered pearl shimmer dust
- vegetable shortening
- water balloons or small balloons
- paper straws or lollipop sticks or wooden skewers, or really anything you can tape a balloon to and stick in a jar
Inflate the balloons to the size(s) you want the bubbles to be. Tape each balloon to a straw. Using your fingers, lightly coat the balloons with the shortening. Place each be-strawed, coated ballon in a jar to keep them from attracting dust or lint.

For tinted bubbles: Mix 1 packet of gelatin, 1/8 tsp of shimmer dust and 2 drops of the food coloring together. Whisk 8 tbsp of water into the mix and microwave for for 30 seconds. Whisk again and let rest for 30 seconds more. For clear bubbles: Omit the food coloring.
Once the gelatin cools, dip the first balloon into the gelatin and spin it to coat the sides. Make sure you leave space around the knot. You will need a quarter sized opening to remove the balloon later. Shake off the excess gelatin. Very carefully place the straw back into the jar, making sure the balloon does not touch any other balloons. Repeat with the rest of the balloons. I made 30 balloons half pink, half clear.

Once all the balloons have been coated, re-dip them all starting with the first balloon. Repeat the dipping process 3-5 times depending on how dark you want the colors to be. I dipped mine 4 times each. If the gelatin starts to get too thick microwave it for 10 seconds and whisk again. Continue dipping until all the balloons are completely coated.
Wait 24 hours for the gelatin to harden. If they feel hard to the touch than they are ready. Using scissors, cut a hole neat the knot of the balloons. The balloons will shrink and shrivel up leaving the hardened gelatin bubble. Gently tug the ballon out of the shell using the straw to maneuver the ballon out of the opening.
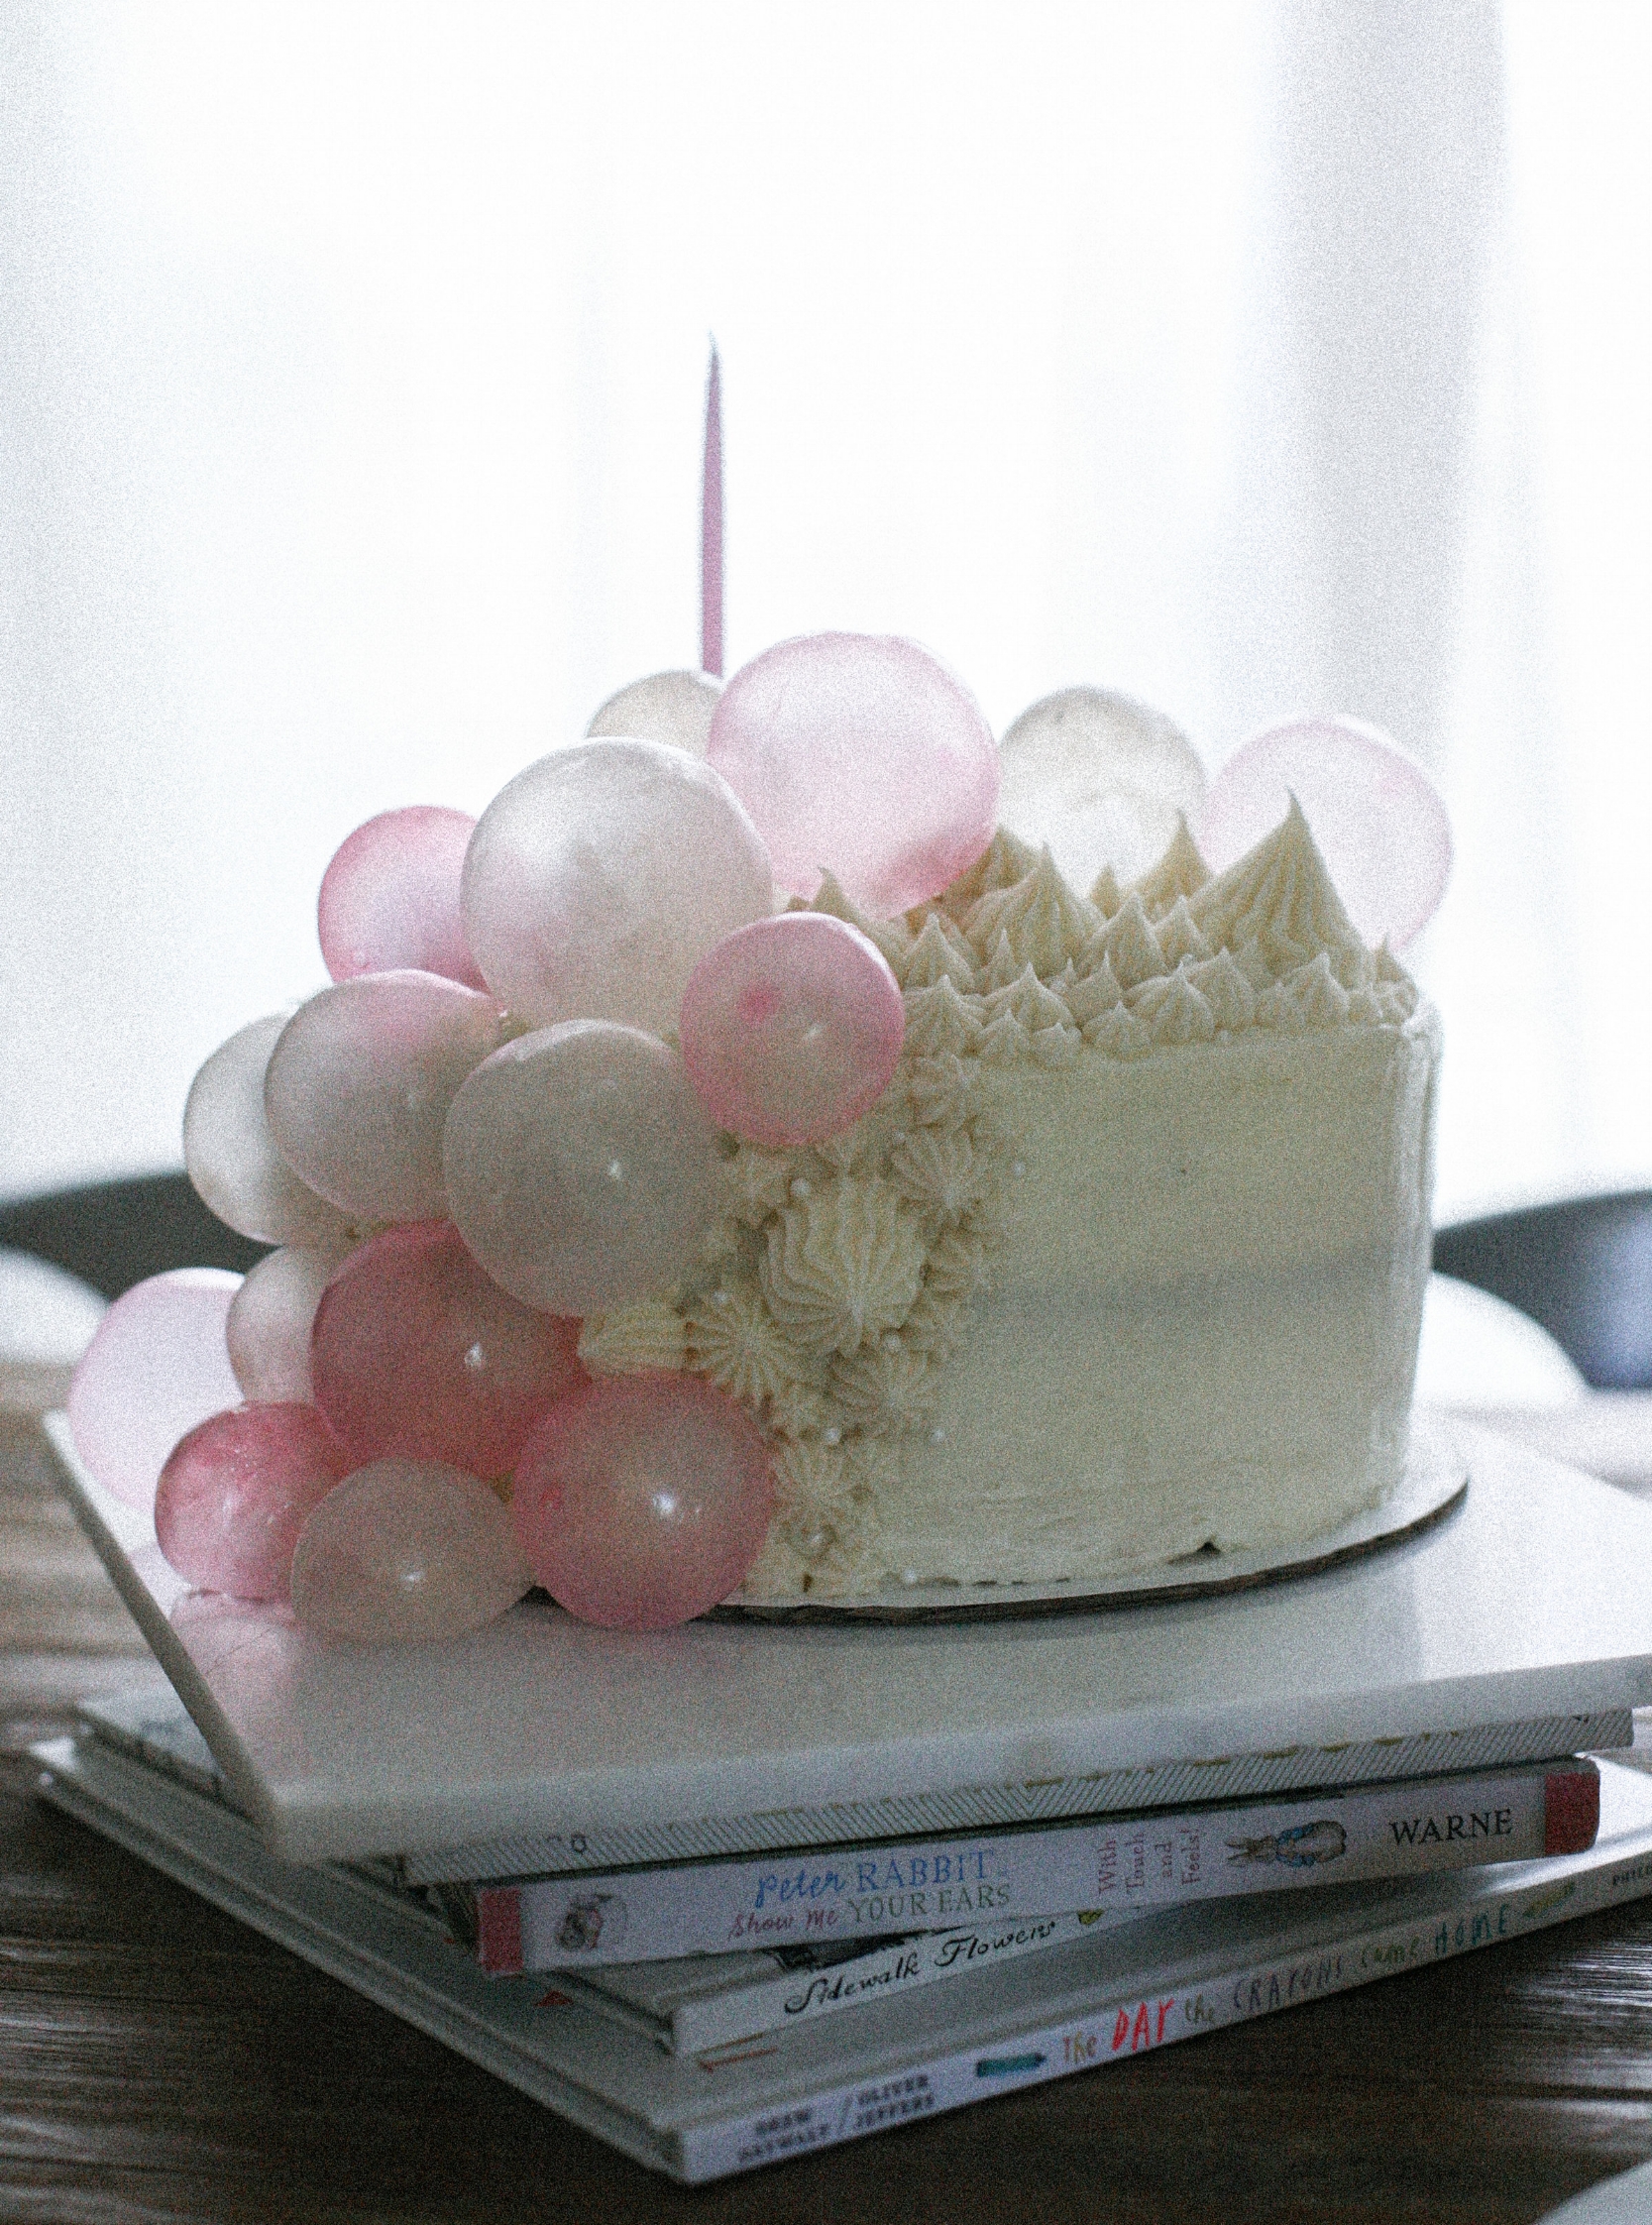
Voila! You have bubbles! Use to top cupcakes, cakes or candy tables or any other party center piece.
Tips:
- Keep your tinted balloons separate from the clear ones. It makes things easier for re-dipping.
- I suggest placing the balloon jars in an out of the way place that is cool and dry with minimal traffic. The last thing you want is a shattered jar with half dried gelatin balloons sticking to your floor.
- Use clear tweezers to pick out any stubborn sticky balloon pieces from the bubbles.
- To get the look, use various sized star tips to pipe the dollops onto the frosted cake. Add sugar pearls and a touch of white shimmer dust once the frosting has set. Place the bubbles on the cake as desired.